


spring的主配置文件:applicationContext.xml
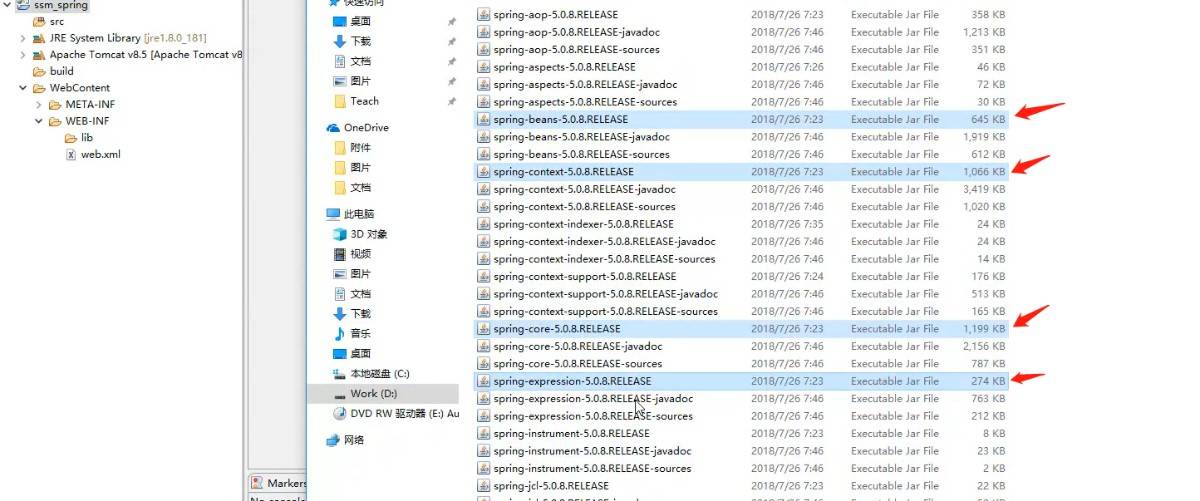
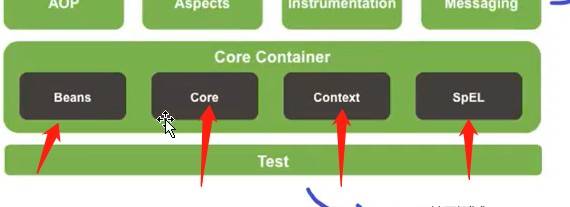
Spring框架需要将核心容器的四个包导入:
spring贯穿在web层、service层、dao层,却不属于里面的任意一层,他作为一个容器,一个管理项目对象的容器,只负责管理。
spring是一个轻量级控制反转(ioc)和面向切面(aop)的容器框架。
DI:yi'lai'zhu'ru
repo.spring.io/release/org/springframework/spring
总结的很全!
使用@RunWith(SpringJUnit4ClassRunner.class)
的时候记得导入test包
执行步骤:
1 before 前置通知
2 将我们要增强的类放进around 中执行
3 afterReturning 成功通知
4 after 后置通知
报错:
BeanFactory not initialized or already closed - call 'refresh' before accessing beans via the ApplicationContext
原因:
使用ApplicationContext ac=new ClassPathXmlApplicationContext();的时候没有传递参数
改为
ApplicationContext ac=new ClassPathXmlApplicationContext("applicationContext.xml");
注意获取容器的时候一定要传递容器对应的配置文件
属性的注入:这里是是代替之前给User对象注入值
有两种方式 1.@Value(value="1")
private Integer u_id;//使用暴力反射注入
2.@Value(value=“0145")//推荐在SET方法上注入
public void setU_password(String u_password) {
this.u_password = u_password;
}
引用类型的注入:
加入我们的User类中含有一个u_pet 属性
那么我们需要在Pet类中作出相应的注解
1 类前面加上@Component("pet")
2 @Value("橘猫")
public void setPetType(String petType) {
this.petType = petType;
}
3 @Value("橘色")
public void setColor(String color) {
this.color = color;
}
4 也是最容易忘记的一点 就是使用自动装配(注意这是在我们的配置文件中没有使用 对应bean 来配资我们的橘猫对象)
//自动装配
@Autowired
public void setU_pet(Pet u_pet) {
this.u_pet = u_pet;
}
对于我们的u_pet 属性的set方法加上 @Autowired 而不是@alue()
否则我们就是使用手动装配的方式
@Resource(name="pet")
比如我们配置了两个一个是 name ="dog" 一个是name="cat" 那么我们就可以使用@Resource(name="cat") 来制定我们使用的使用名为cat 的这个pet对象
例如 <!-- 配置一个橘猫宠物对象 -->
<bean name="cat" class="com.chengyang.bean.Pet">
<property name="petType" value="橘猫"></property>
<property name="color" value="橘色"></property>
</bean>
<!-- 配置一哈士奇宠物对象 -->
<bean name="dog" class="com.chengyang.bean.Pet">
<property name="petType" value="哈士奇"></property>
<property name="color" value="纯白"></property>
</bean>
第一步:
<!-- 开启组件扫描 base-package 扫描该包下以及子包下的所有注解 -->
<context:component-scan base-package="com.chengyang.bean"></context:component-scan>
第二步:在该包下的类前面使用注解
//<bean name="user" class="com.chengyang.bean.User"/>
//用下面的注解机代替
@Component("user")
第三步:我们从容器中获取对象时候使用
ApplicationContext ac=new ClassPathXmlApplicationContext("applicationContext_annotation.xml");
User2 u2=(User2)ac.getBean("user");
System.out.println(u2);
他会自动去指定容器applicationContext_annotation.xml
中的指定的base-package="com.chengyang.bean"中找有@Component("user")的类然后创建一个对象
在将来的实际使用中我们实际上不会去使用@Component("user") 注解而是使用下面三个注解
@Controller
@Service
@Repository
/----------------------------/
使用@Scope(scopeName="singleton")
代替我们之前在bean 中配置的scope="singleton"
对于我们使用的init-method="initMethod"
可以直接在User类的initMethod前面使用
@PostConstruct
public void initMethod() {
System.out.println("initMethod");
}
@PreDestroy
public void destroyMethod() {
System.out.println("destroyMethod");
}
复杂型注入
<!-- array -->
<property name="array">
<array>
<value>123</value>
<value>abc</value>
</array>
</property>
<!-- list -->
<property name="list">
<list>
<value>123</value>
<value>abc</value>
</list>
</property>
<!-- set -->
<property name="set">
<set>
<value>123212</value>
<value>absac</value>
</set>
</property>
假如 list中只存在一个元素 可以直接在properties 标签中添加值 比如 value="1"
ref="dog"
Map
<!-- map -->
<property name="map">
<map>
<entry key="username" value="root"/>
<entry key="password" value="123"/>
</map>
</property>
properties
<!-- properties -->
<property name="properties">
<props>
<prop key="username">崔傻屌</prop>
</props>
</property>
构造器注入,依据参数而不是参数名类型,并且依据顺序调用
//Parameter constructor method1
public User(String u_username, Pet u_pet) {
System.out.println("method 1:String ,Pet");
this.u_username = u_username;
this.u_pet = u_pet;
}
//Parameter constructor method2
public User(Integer u_username, Pet u_pet) {
System.out.println("method 2:String ,Pet");
this.u_username = u_username.toString();
this.u_pet = u_pet;
}
创建两个这样的构造器,在applicationContext.xml配置文件中这样配置
<!-- 构造方法注入 -->
<bean name="user1" class="com.chengyang.bean.User">
<!-- name 是注入构造方法的名称,value是注入值类型,ref是注入引用类型 -->
<constructor-arg name="u_pet" ref="dog"/>
<constructor-arg name="u_username" value="121" type="java.lang.Integer" />
</bean>使用type指定u_useranme的类型这样就会调用method2
并且会根据在配置文件中的参数顺序调用User类中的构造器
原生类型和引用类型的注入
init-method="initMethod"
在容器创建之后马上调用
destroy-method="destroyMethod"
容器销毁之前调用(使用多例的时候容器不会帮你执行destroyMethod方法)
scope="singleton" :单例 多个引用指向同一个User对象
scope="prototype" :多例 多个引用分别指向不同的对象
设置成request 的时候与request绑定,生命周期一致,session 同理
name id class 延迟加载
安装STS插件 在help about 中查看自己是否安装了IDE
src下创建com.chengyang.bean 包和User.java类
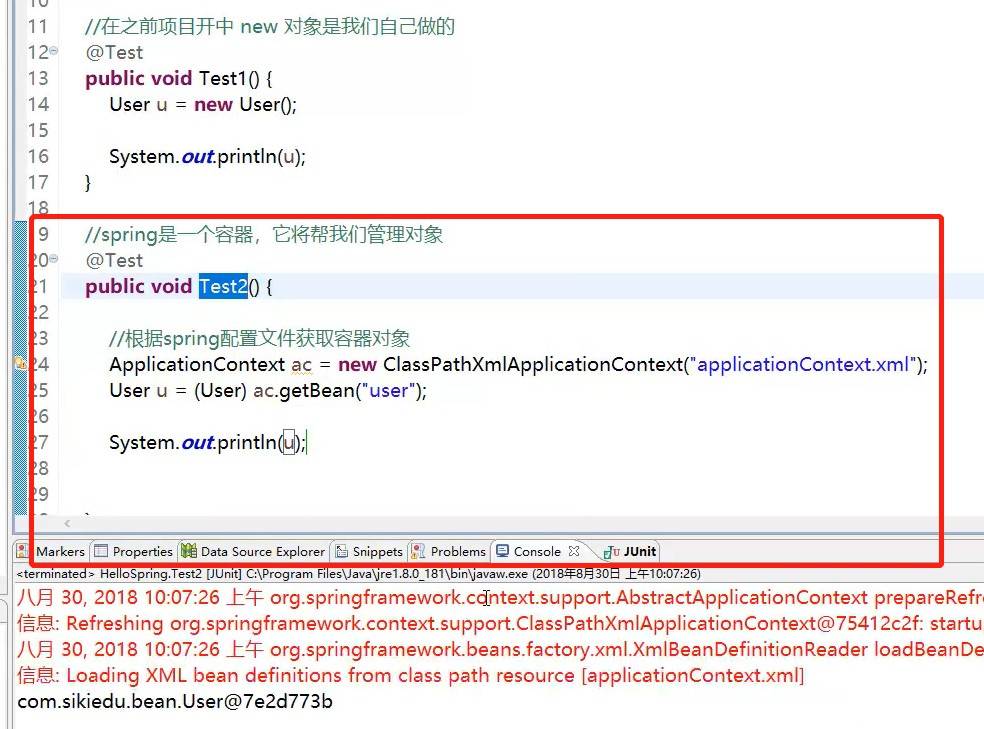
1.普通方式获取对象,使用的是new 创建对象
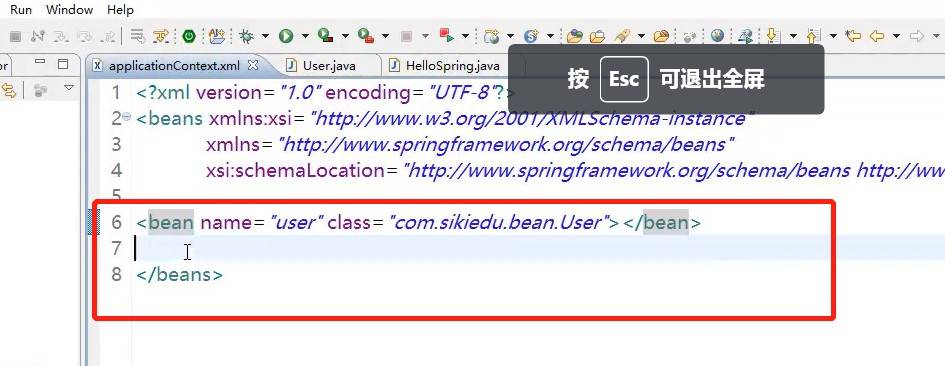
2.在spring中我们先在applicationContext.xml配置文件中 设置<bean name="user" class="com.chengyang.bean.User"></bean> 这么做就是把我们的User对象交给spring处理,然后声使用
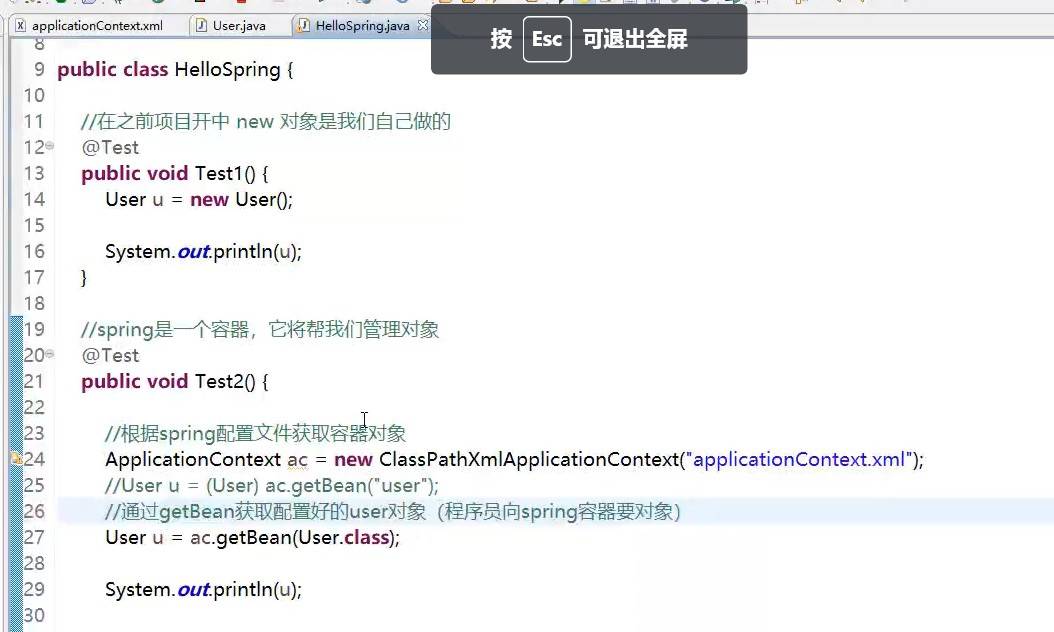
ApplicationContext ac=new ClassPathXmlApplicationContext("applicationContext.xml");
User u=ac.getBean(User.class);
// User u=(User)ac.getBean("user");
获取对象
1导包:在WEB-INF /lib下 引入 bean context core expression 包以及loggin包
2创建配置文件:在src 下创建配置文件(选择XMLFILE)applicationContext.xml
3.,进入applicationContext.xml 先先创建<beans></beans>选择design模式 ,右键beans 编辑命名空间 添加xsi 和手动添加之前的spring-bans.xsd